准备工作
在项目文件下使用Build Path导入必须的五个包:
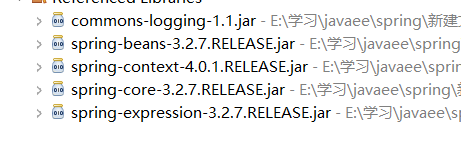
(这里注意导入的包不要冲突(建议不要导入同名的其他版本,本人导入了其他版本运行时发生错误))
下面来看一个简单的Spring程序
HelloWorld类
1
2
3
4
5
6
7
8
9
10
11
12
13
14
| package org.test;
public class HelloWorld {
private String message;
public String getMessage() {
return message;
}
public void setMessage(String message) {
this.message = message;
}
}
|
配置文件
1
2
3
4
5
6
7
8
9
10
11
12
|
<?xml version="1.0" encoding="UTF-8"?>
<!DOCTYPE beans PUBLIC "-//SPRING/DTD BEAN/EN"
    "http://www.springframework.org/dtd/spring-beans.dtd">
<beans>
    <bean id = "HelloWorld" class = "org.test.HelloWorld">
        <property name="message" >
            <value>Hello World!!!!!!!!!!!!!!!!!!</value>
        </property>
    </bean>
</beans>
|
分析
Bean id为bean的id,class为所配置的类
Property name为属性名 value为属性值
测试类
1
2
3
4
5
6
7
8
9
10
11
12
13
14
15
16
17
| package org.test;
import org.springframework.beans.BeansException;
import org.springframework.beans.factory.config.ConfigurableListableBeanFactory;
import org.springframework.context.ApplicationContext;
import org.springframework.context.support.AbstractApplicationContext;
import org.springframework.context.support.AbstractXmlApplicationContext;
import org.springframework.context.support.FileSystemXmlApplicationContext;
public class Main {
public static void main(String args[]){
ApplicationContext ac = new FileSystemXmlApplicationContext("src/ApplictionContext.xml");
HelloWorld hw = (HelloWorld)ac.getBean("HelloWorld");
System.out.print(hw.getMessage());
}
}
|
分析
新建ApplicationContext对象来导入配置文件xml,相当于创建了一个工厂
通过getBean(ID)方法来获得产品
通过强制转换来将工厂中获得的产品来转换为HelloWorld对象
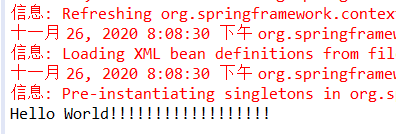
运行结果: